Organizations, locations and branches
Every gym on Prism belongs to an organization, and the organization decides how your locations relate: one independent gym, a chain with shared members and books, or a franchise of independently-owned branches with head-office roll-ups. A single-site gym can be promoted into a chain or franchise later without re-onboarding — start simple and grow into it.
What you'll do
Set the organization's identity, operating model, brand and access tiers; add a location with its hours, timezone and currency; and switch between branches while you work.
You'll need: an owner account. Single-location gyms can skip the tiers and switching steps — those controls hide themselves until you have something to switch between.
Steps
-
Open Settings → Organisation.
-
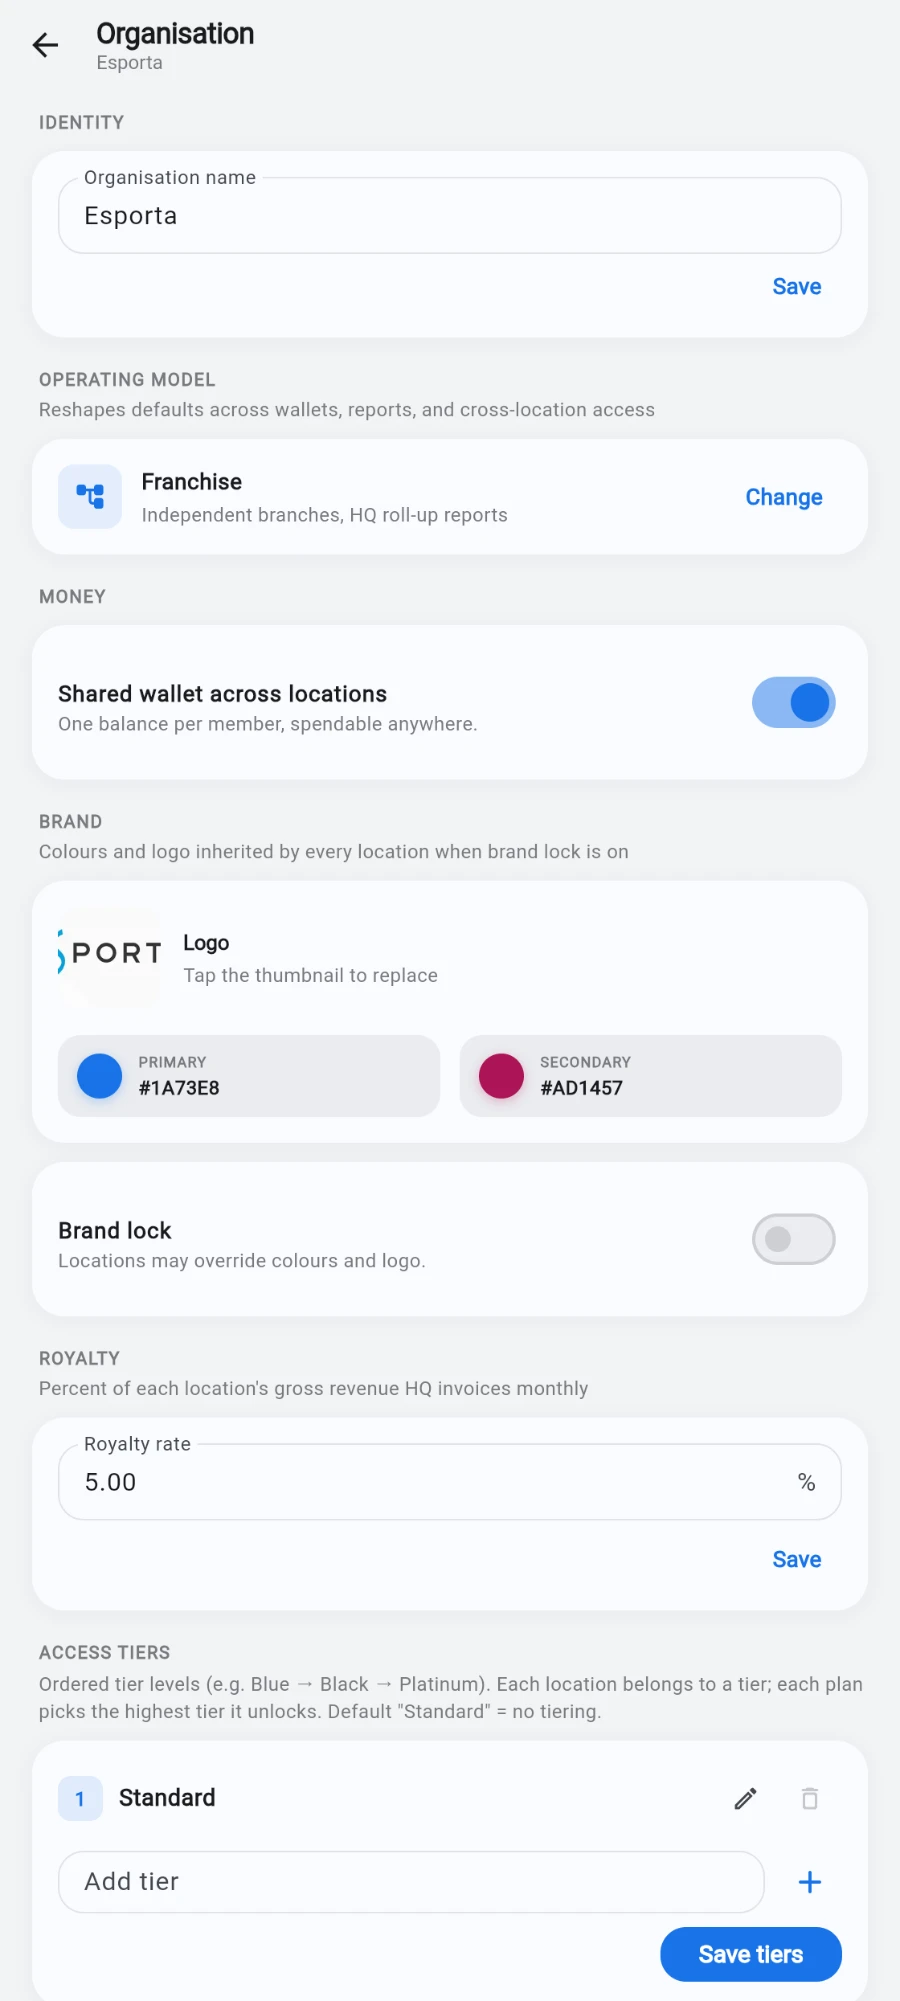
Under Identity, set the Organisation name and tap Save.
-
Under Operating model, tap Change and pick: single location (one branch, chain features off), chain (multiple branches, shared books and wallet), or franchise (independent branches, head-office roll-ups and royalties). This reshapes defaults across wallets and reports — set it deliberately.
-
Under Money, decide the wallet scope with Shared wallet across locations — one balance per member spendable anywhere, or a separate wallet per branch.
-
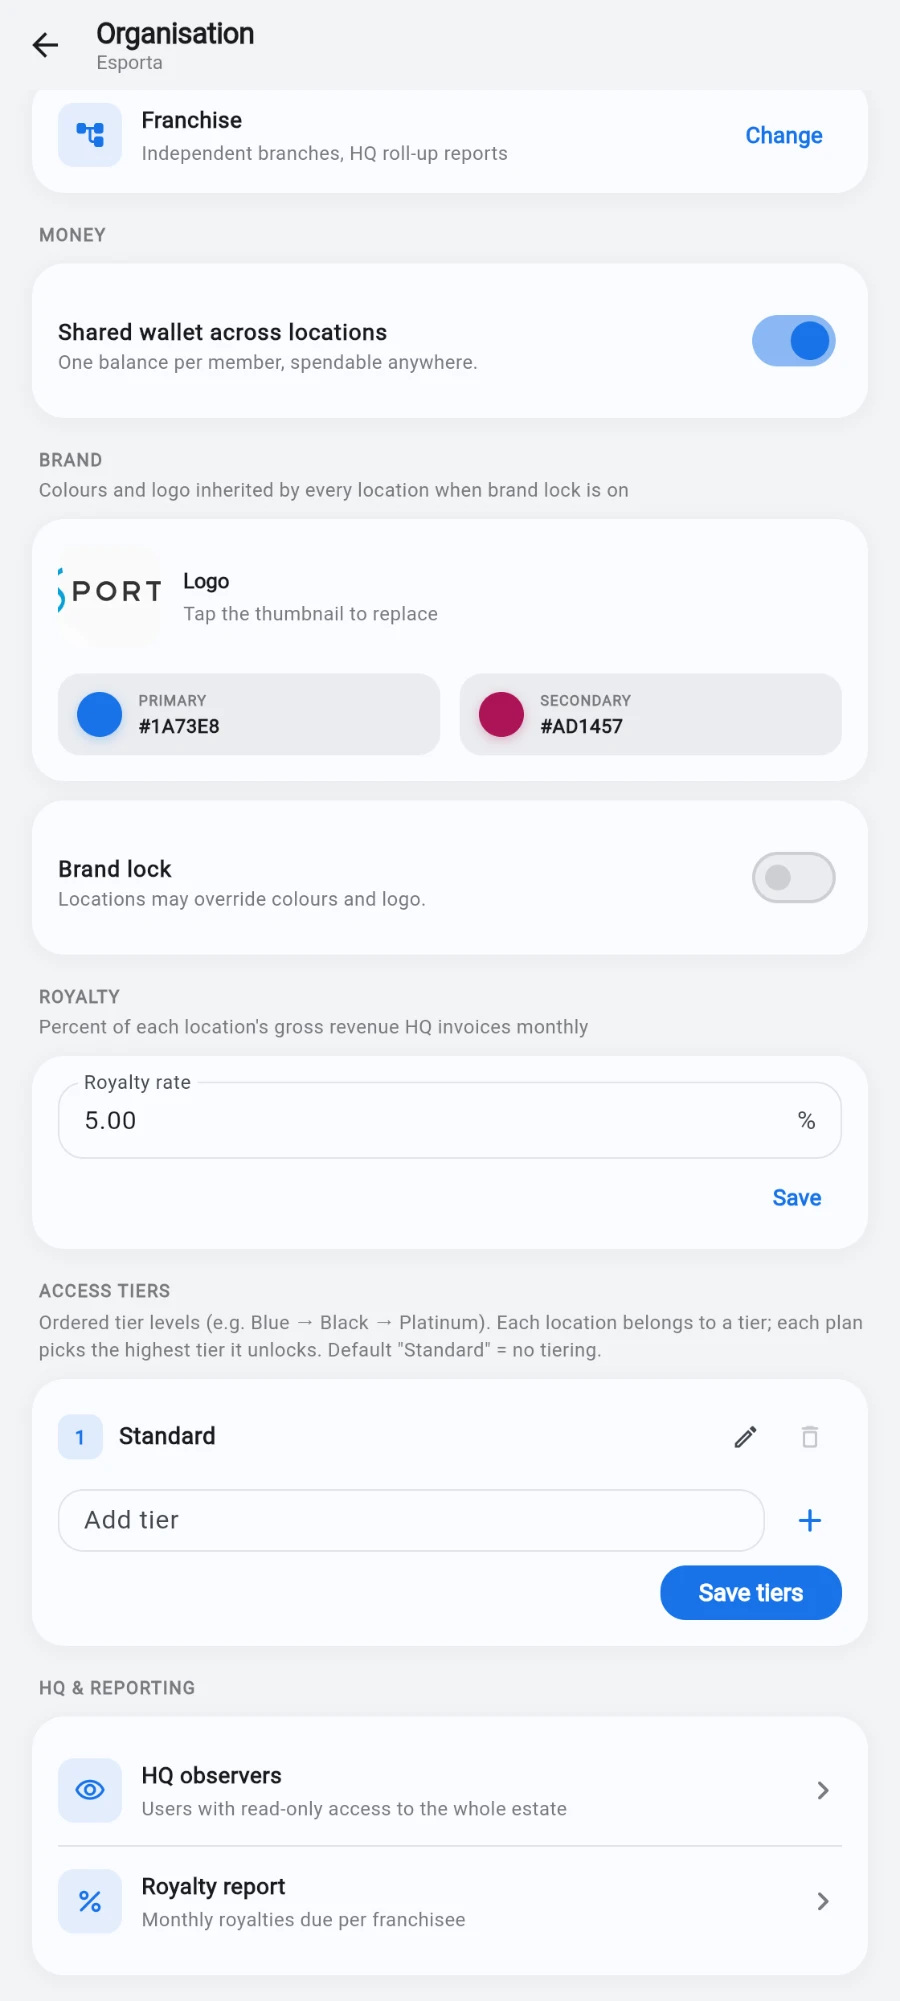
Under Brand, upload the logo, pick the primary and secondary colours, and set Brand lock if head office should keep brand control — locked locations inherit the organization's colours and logo and cannot override them. Changes repaint the app immediately.
-
Under Access tiers, define your ordered tier ladder (for example Blue, Black, Platinum) with Add tier, rename or remove tiers, and tap Save tiers. The first tier is the lowest and most broadly reachable. Single-tier organizations never see tier pickers anywhere — simple gyms keep simple forms.
-
Now add a branch: open Settings → Locations and tap Add location.
-
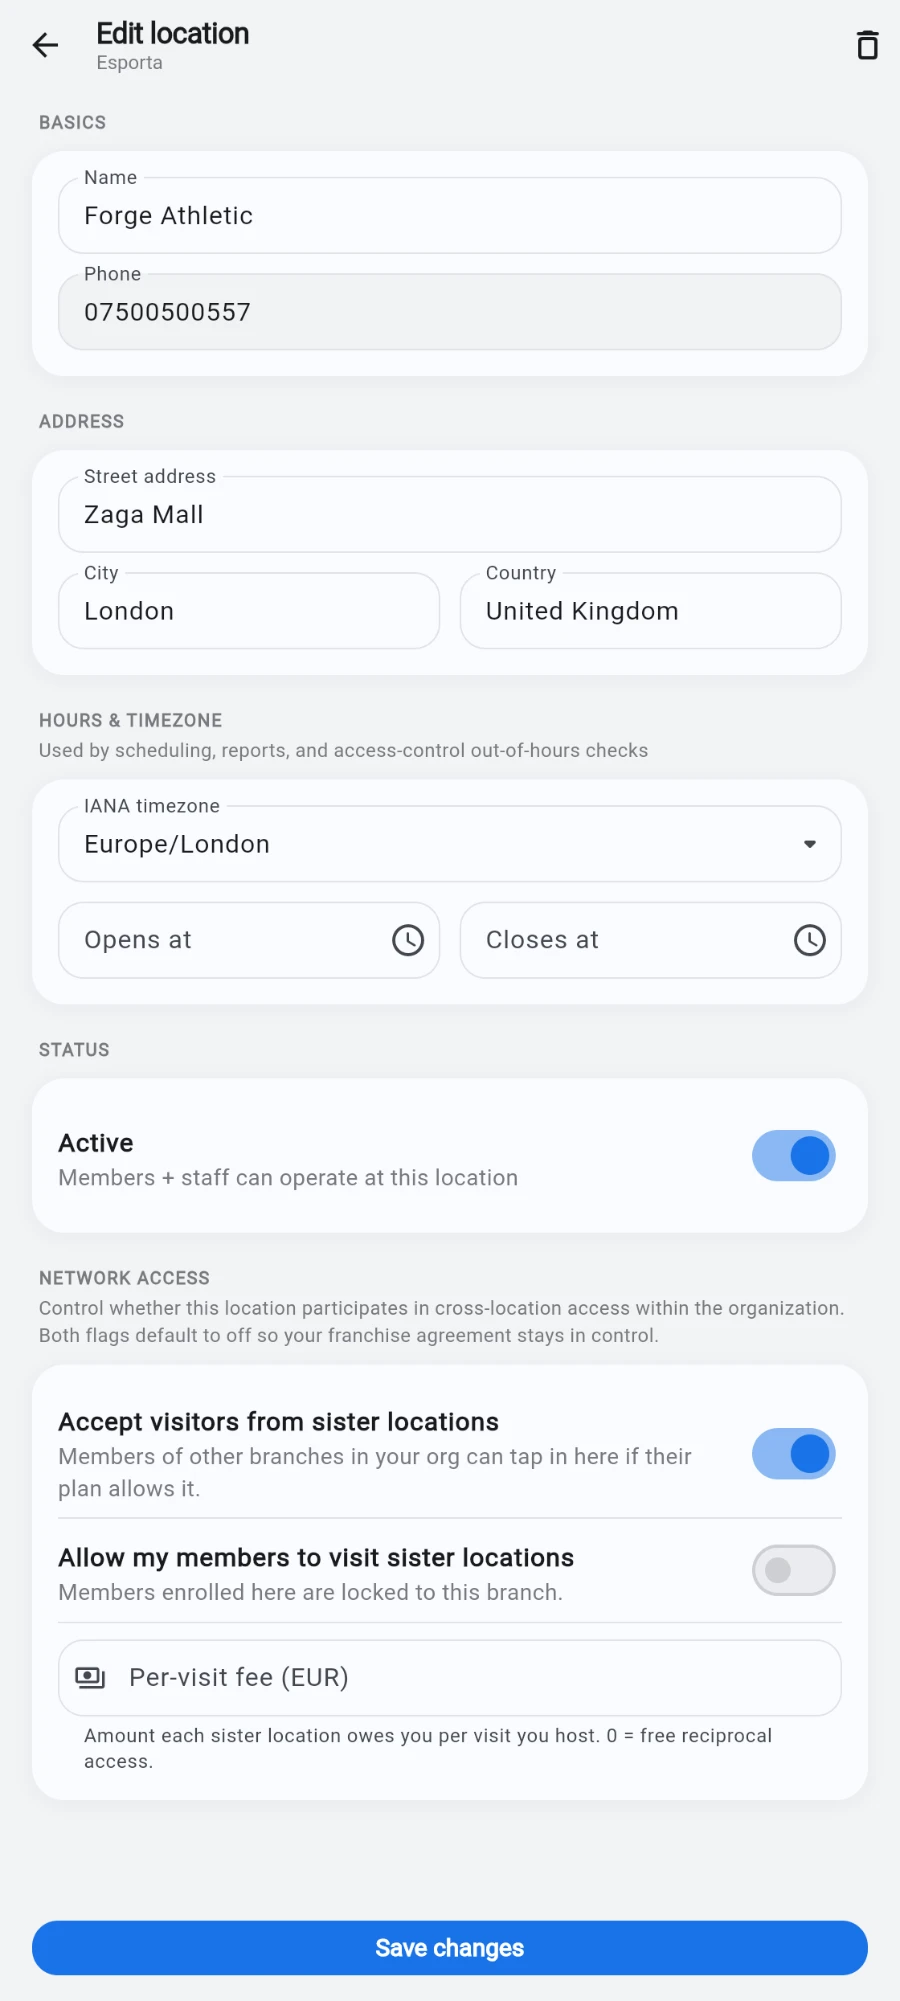
Fill the essentials — name, phone, address, and under Hours & timezone the timezone plus Opens at and Closes at. Scheduling, reports and access windows all use these.
-
Pick the location's Access tier if you defined a ladder — plans that open "all locations up to Black" will match against it.
-
Set the status Active and tap Create location. Inactive locations hide from the switcher and reports without deleting anything.
-
To move between branches while working, tap the location pill in the app bar and pick a branch in the Switch location sheet. The whole app — roster, revenue, POS shift — re-points to the branch you picked, confirmed by a "Switched to" message. On single-location installs the pill doesn't render at all.
Your own subscription to Prism is visible under Settings → Billing & plan: the current plan with a status chip (trial, active, payment overdue and so on), member and location usage meters against your plan's quotas, and Change plan and Manage billing for self-service changes. Adding locations counts against the location quota, and the same screen warns you as you approach either limit — honestly, before anything blocks.
What you should see
An organization whose branches share (or deliberately don't share) members, wallets and brand according to the model you picked; a location list showing every branch you can access with the current one marked; and an app-bar pill that flips the entire app between branches in one tap.
If something goes wrong
- The switcher pill is missing — you only have one active location, or your account isn't assigned to the others. Assign access under the staff settings.
- A location can't override its colours — Brand lock is on at the organization. Unlock it or accept head-office branding.
- Tier picker nowhere to be found — you have a single tier. Add a second under Access tiers and the pickers appear on locations and plans.
- A new branch can't be created — you may be at your plan's location quota; check Settings → Billing & plan for the meter and an upgrade path.
Still stuck? Email hello@prismgym.com — include your gym name, the device, and a photo of what you see.