Menu boards from your POS
A menu board is not a picture of your menu — it is your menu. The board stores which products it shows, and each TV resolves the photo, name and price live from your POS at play time. Change a price at the till and the wall re-renders on its own; nobody touches signage. The same editors also handle titles, logos, themes and per-product display names.
What you'll do
Create a café menu or product board from your POS catalogue, choose its layout and theme, tune what it displays, and understand the board title and logo defaults.
You'll need: products in your POS catalogue (with photos and prices set there), and a staff sign-in on the admin app.
Steps
-
Open Signage from the drawer, tap Tools, choose Images & boards, then add a new item and pick Café menu ("Sectioned menu board — replaces printed signs") or Products ("Pick from POS — photo, name & price stay live").
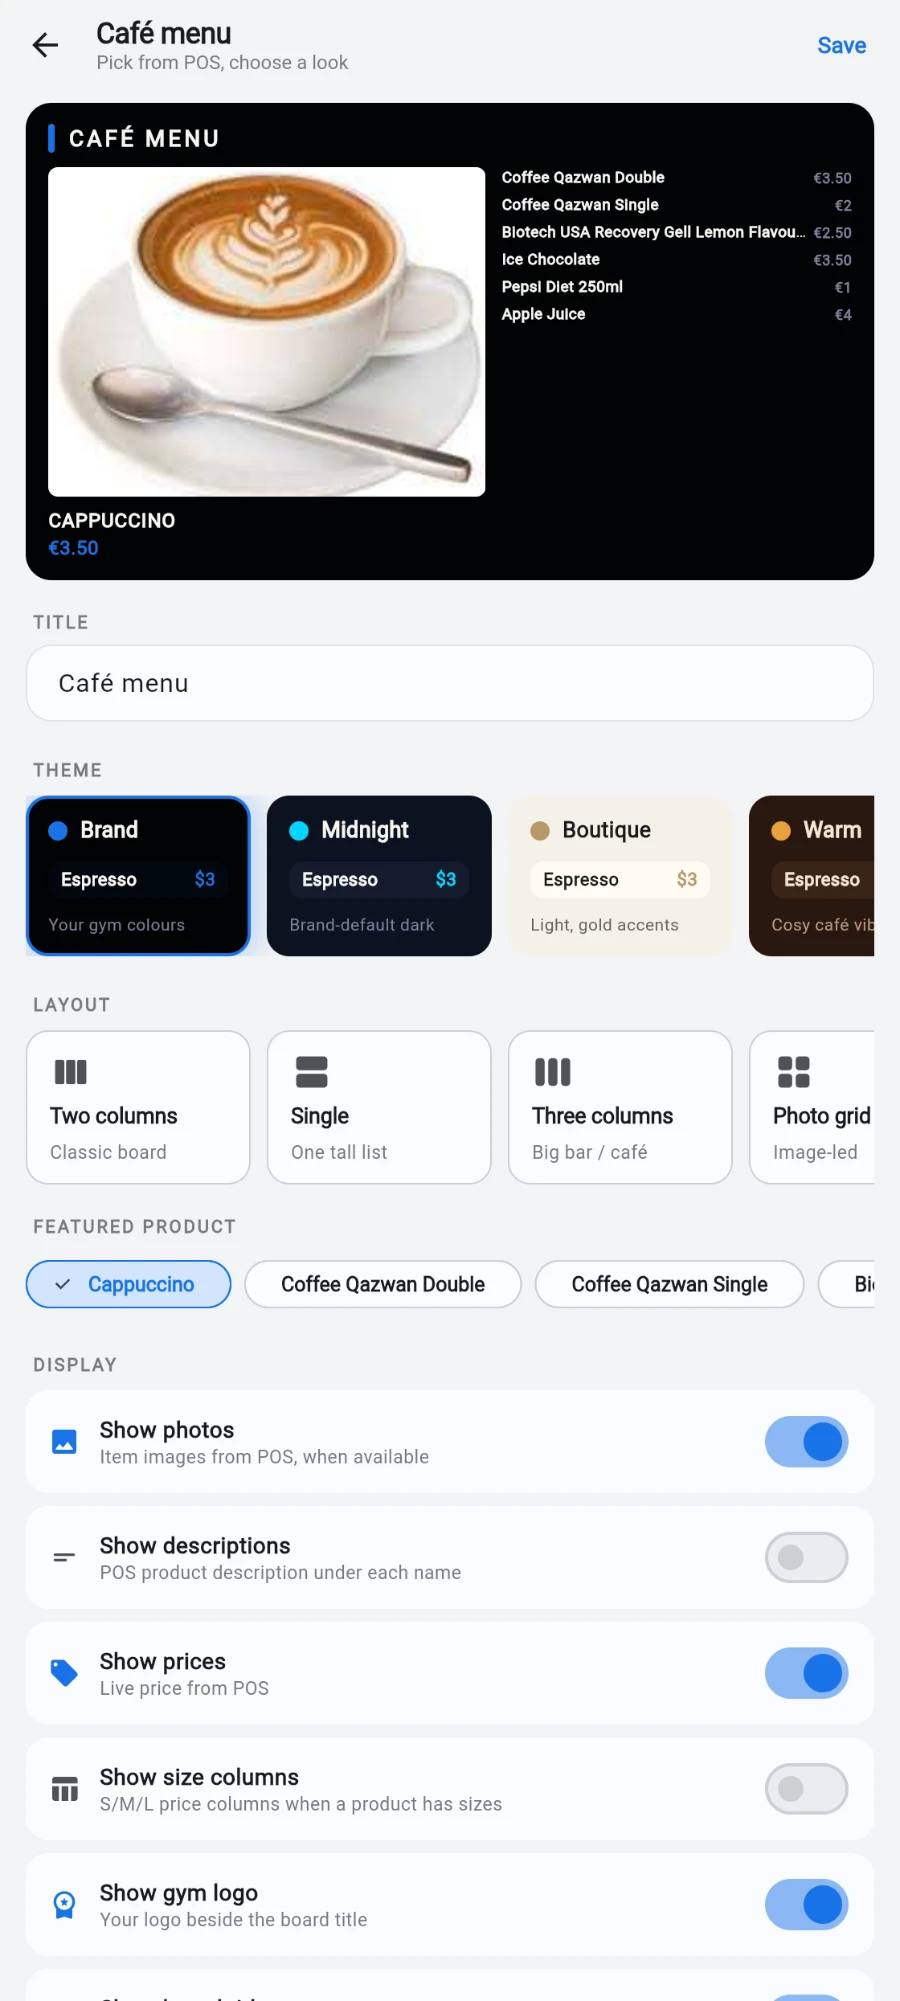
The Cafe menu editor with the live preview at the top -
Give the board a Title. Titles scale down to fit on one line — they never wrap.
-
Pick a Theme — the live preview at the top re-renders the actual board as you make choices.
-
For a café menu, pick a Layout: Two columns (classic board), Single (one tall list), Three columns (big bar or café), Photo grid (image-led), or Featured (hero plus prices, with a Featured product you choose). For a products board, pick a Style: Featured (one big hero), Grid (photo tiles), or Carousel (auto-rotating). Long catalogues paginate and rotate through pages automatically.
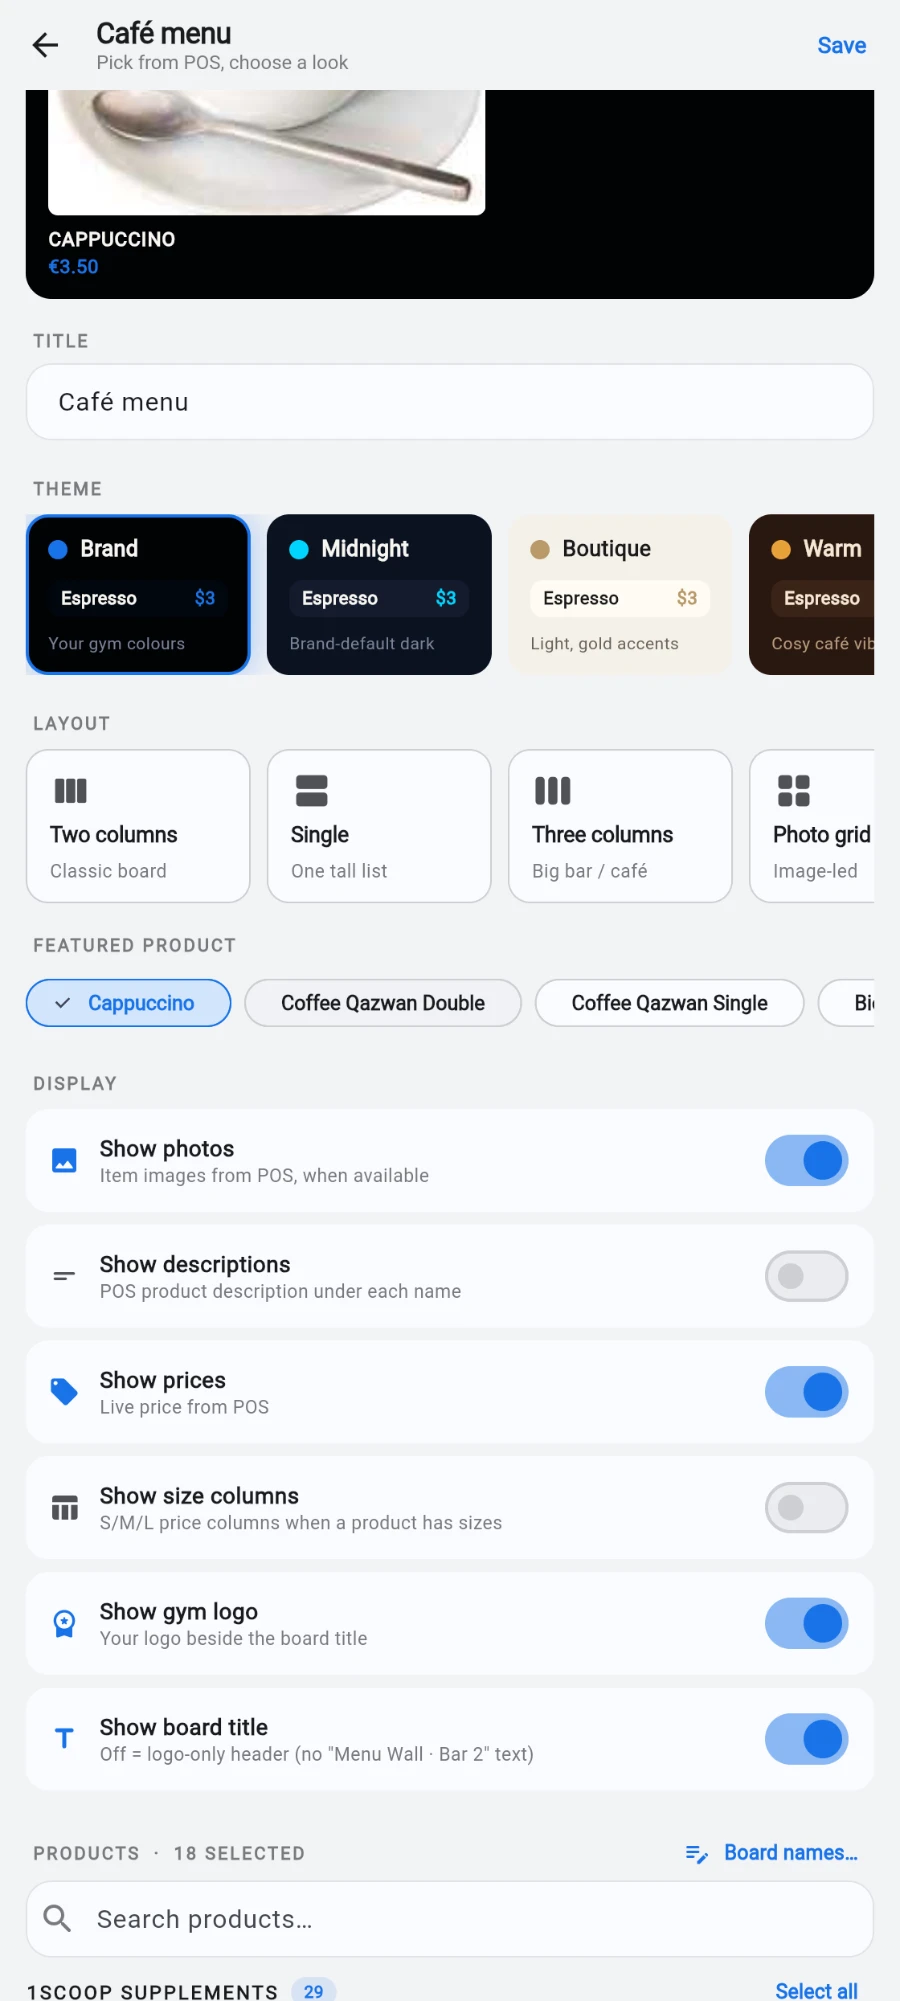
The layout choices and theme row in the editor -
Under Products, search and tap the items to include. Use Select all and Clear to work in bulk.
-
Out-of-stock products appear greyed with an OUT OF STOCK tag and cannot be added — the till refuses to sell them, so a board should not advertise them. An out-of-stock item you had already selected stays tappable so you can toggle it off; Select all only ever adds in-stock items.
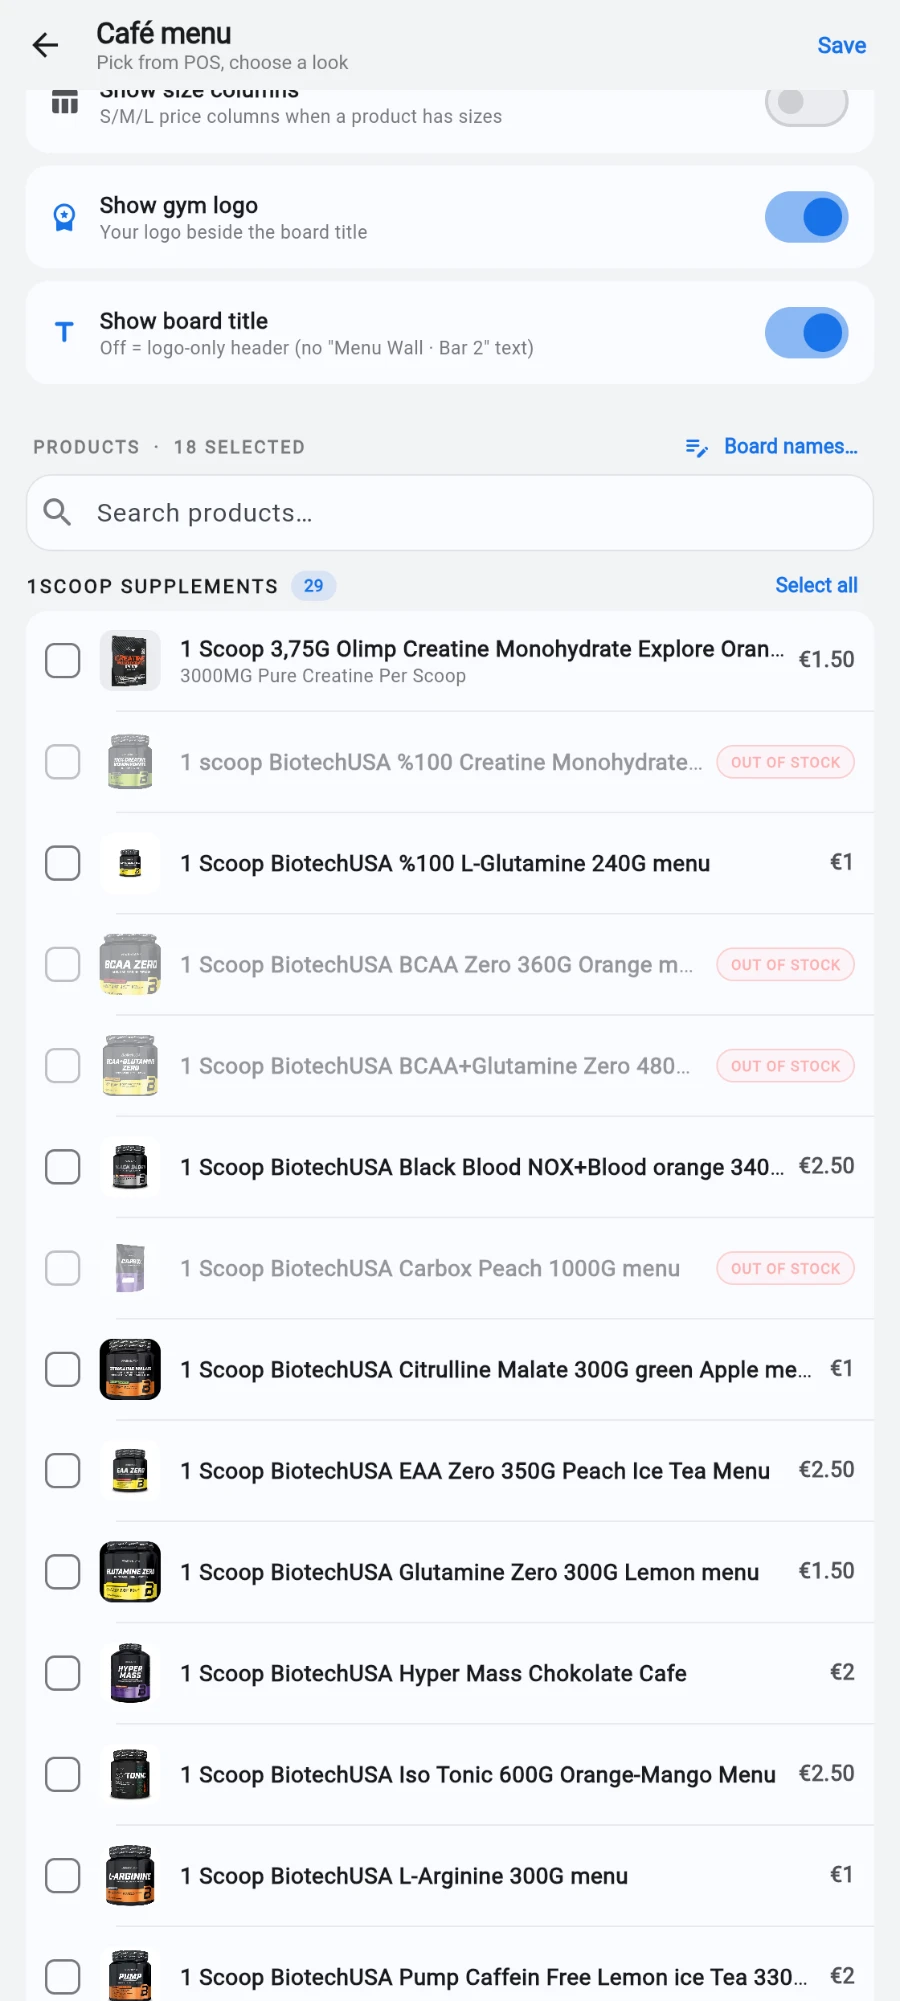
The product picker with an out-of-stock item greyed -
Tune the Display toggles: Show photos, Show descriptions, Show prices ("Live price from POS"), Show size columns (S/M/L price columns when a product has sizes), Show gym logo, and Show board title.
-
To shorten a long POS name for the wall — say, a full supplement name down to "Creatine" — open Board names…, type a short display name per product (or tap Auto-fill), and tap Done. The POS record itself is untouched.
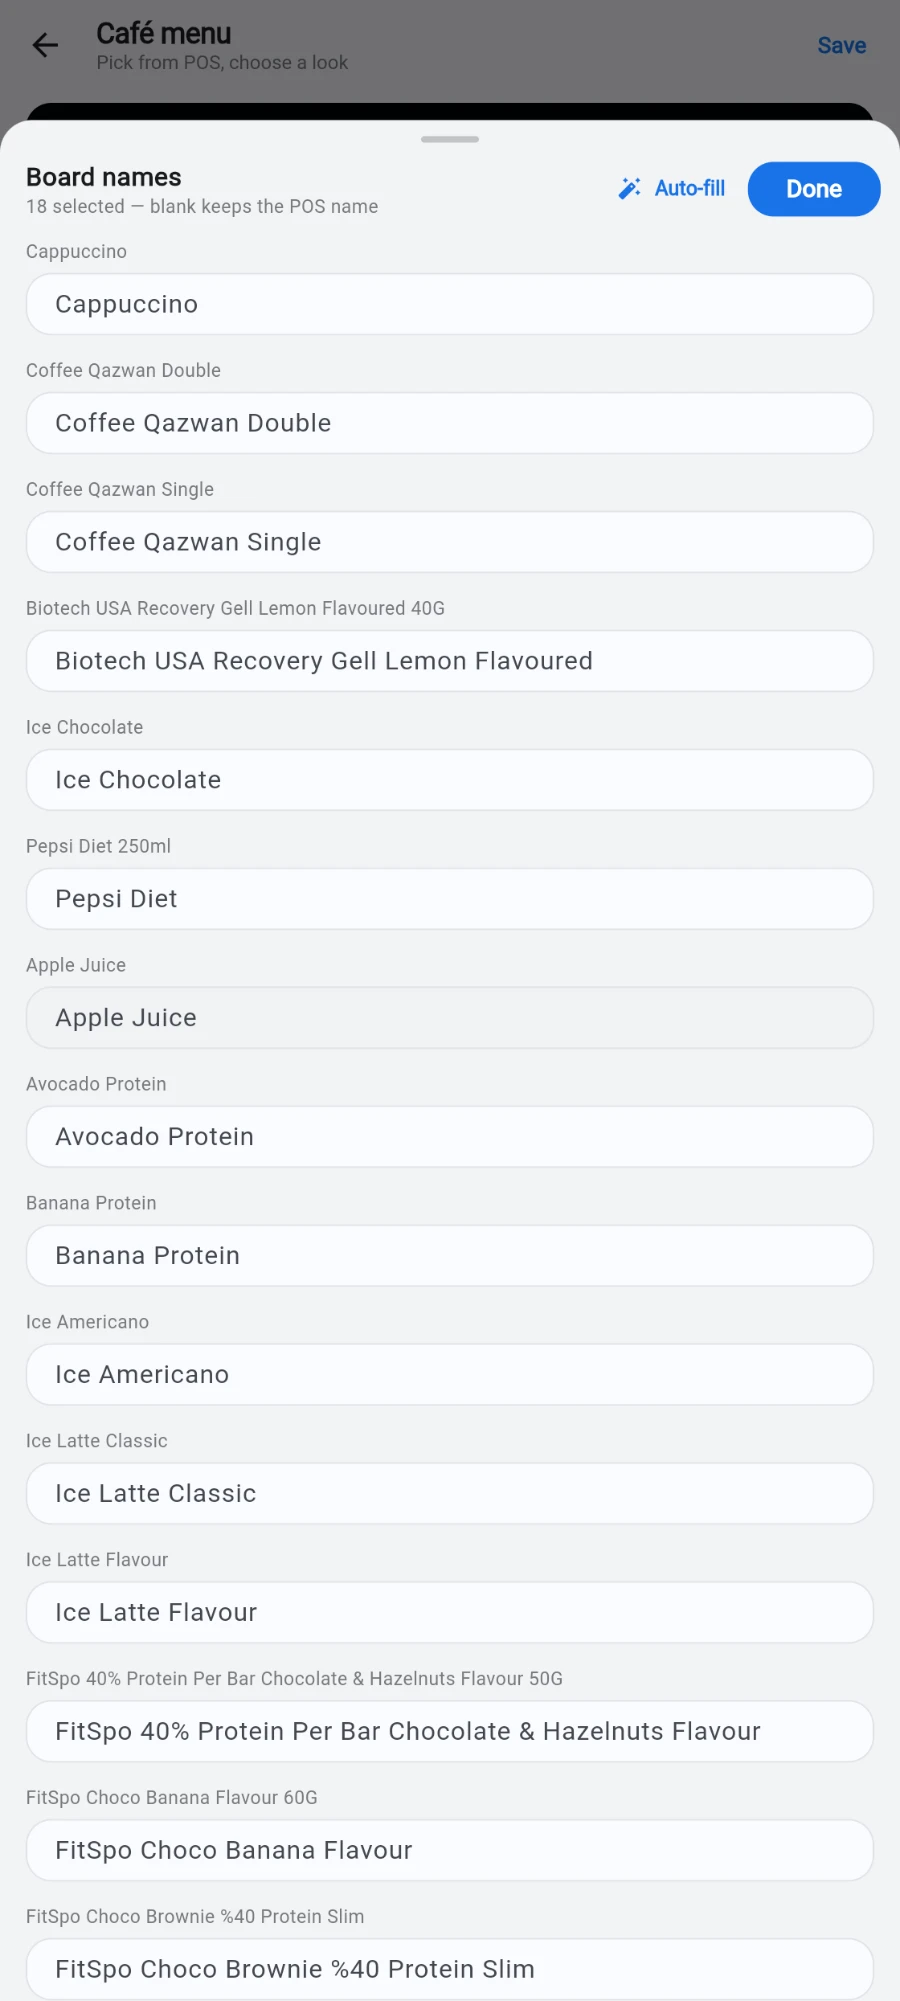
The Board names sheet with short display names per product -
Tap Save. Add the board to a playlist and assign it to a screen — from then on it maintains itself.
What you should see
The board on the TV matches the in-editor preview: your theme, your layout, live prices. Sell out of a product at the till and it will not appear the next time the board's product list is edited; change a price and the wall updates without any signage work.
If something goes wrong
- "No POS products yet" — the picker is empty because the POS catalogue is. Add products (with prices and photos) in POS first, then come back.
- A product photo is missing on the wall — the board shows whatever the POS record has. Add the photo to the product in POS.
- A product you want is greyed out — it is out of stock at the till. Restock it in inventory and it becomes selectable again.
- The title looks tiny — long titles shrink to stay on one line. Shorten the title, or turn Show board title off for a clean logo-only header.
Still stuck? Email hello@prismgym.com — include your gym name, the device, and a photo of what you see.